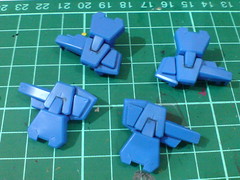
Starting to work on some parts from 1/100 Gundam Avalanche Exia after the lengthy introduction in the previous posting. ^^;
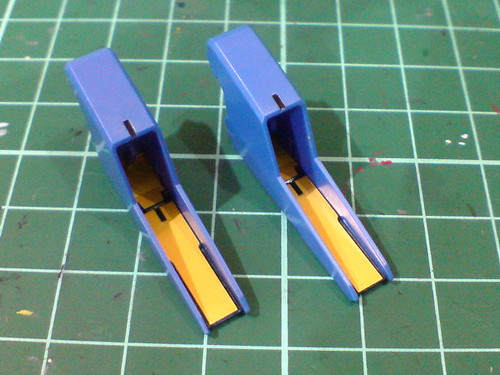
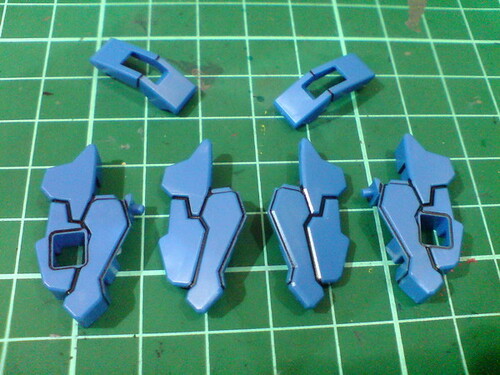
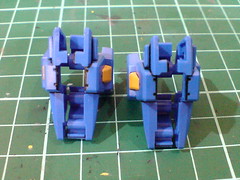
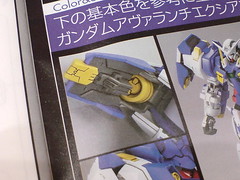
One of the most prominent features of Gundam Avalanche Exia is having long and flat yellow parts inside some of its blue armors. For example, the rear shoulder thruster cases:

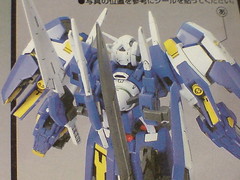
The color contrast between blue and yellow makes those components stand out easily on the entire body, which helps to "spice up" the look of the overall form as well. Having just all white and blue armor parts for the entire form would be pretty dull I imagine. ^^; Yellow as the color of those components' interior is consistent with the chest vents' allocation of colors as well, so the design certainly makes sense. ^^
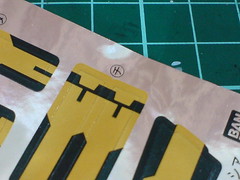
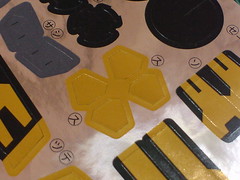
In terms of this Gunpla's design, detailing for all the yellow interior is made convenient as foil sticker pieces are included for them. ^^ Initially when I got this kit, I was planning to paint all of them to get a better look for those parts. However, after quite a while of pondering and from the experience of applying tons of foil stickers on HGUC Sinanju, I realize that foil stickers could be applied to look really good on kits, especially on flat surfaces with little or no elevated parts. Coincidentally, there are many of such surfaces on this kit, so why bother taking the long way for the same objective, if there's an obvious shortcut that would work. ^^
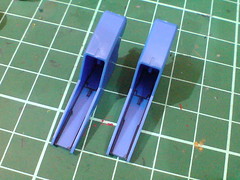
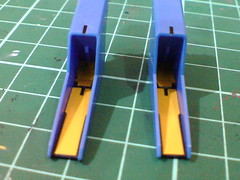
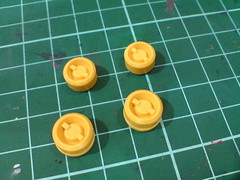
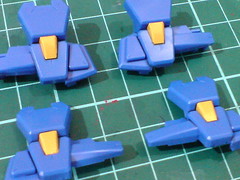
Here's how the combination of foil sticker and painting works on the rear shoulder thruster cases:
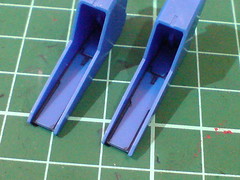
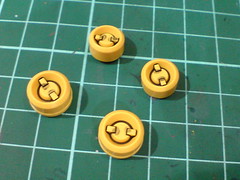
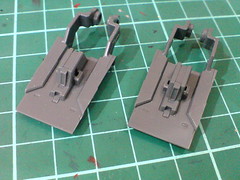
Panel lined the edges using the black paint with thinner method.
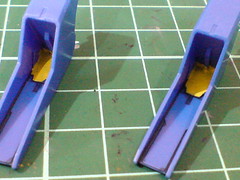
(Left) The foil sticker pieces given aren't long enough to cover the deeper areas inside the cases.
(Right) Said deep areas are painted using Gundam Marker Yellow.
Foil stickers are used for the areas in front. ^^
By pressing those black segments downward using a blunt toothpick, the sunken areas on the parts can be realized.
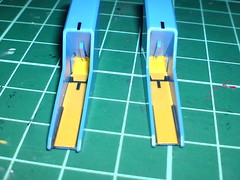
The marker paint is of a different shade of yellow as compared to the stickers, but the area painted is too far inside the cases to really be noticeable, which is why I didn't really bother cleaning up some of the excessive paint inside there as well. ^^;
The purpose of painting the parts is just to make sure that if there's any space not covered by the thruster, the yellow painted area inside the case can be the coverup XD
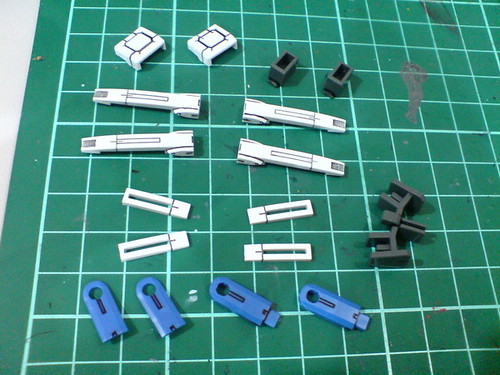
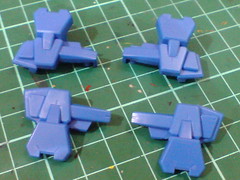
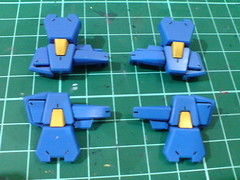
Simple panel lining for some of the other shoulder armor, beam sabers/daggers and mount rack parts.
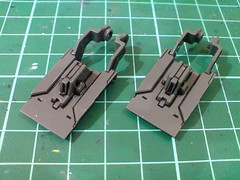
Same business as those on 1/100 Gundam Virtue's rear skirt armor, the line details inside the two shoulder thrusters are too difficult to be reached by normal panel liner, so the more versatile (a lot more ^^) black paint with thinner method is used instead.
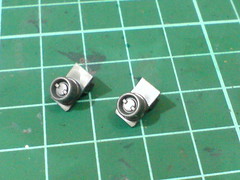

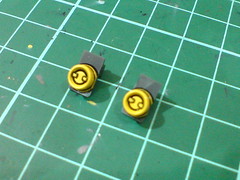
Molded together with the gray parts, paint work is required to reveal the two rear shoulder thrusters.
They are painted using Gundam Marker Yellow before finished with panel lines.

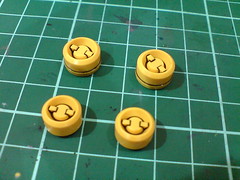
Those yellow "tabs" on the forearm armors are very troublesome for any paint work to be applied. ^^; I suppose I'd take the simpler way out by using the foil stickers instead. ^^
Panel lined the edges using the black paint with thinner method.
Since they are cut according to the "tabs"' shape, the stickers would be a waste if not used I think. ^^;
Some simple panel lines are added to all the four parts.
Despite having plenty of intricately molded details, no special color is required for the interior part of the shoulder armors according to the manual.

Just panel lining will do then. ^^
The only components painted this time are the rear shoulder thrusters it seems. The amount of work on the parts is certainly lesser - omitted the shoulder thruster cases and "tabs" on the forearm armors in this posting alone, but the shortcut didn't take away the details that might otherwise be preserved through painting at all. ^^ Therefore, more shortcuts will be taken in subsequent work on other parts of the model. ^^
Moving on to the rest of the shoulders' and arms' parts next. ^^


1 comment:
for a second i thought that u were building an MG Duel Assaultshroud. :D hahaha....
Post a Comment